Canon Pixma Printer Feeds Paper Part of Way
I have a cheap Canon Pixma MG5750, a Currys PC World purchase when I needed a cheap multifunction printer fast. Was handy at £45 (another set of genuine ink for it costs the same, go figure) but obviously I never expected it to be perfect.
Unfortunately, one of the fundamental requirements of any printer - to be able to take in paper successfully - was a little lacking with this unit. Resarch indicates it's sadly a common issue with this range of Canon printers.
Soon after buying mine, the paper feed (take-up of paper from the tray into the mechanism) started to behave irregularly; soon after that I ended up having to nudge each sheet of paper in to the printer, it was unable to take in paper itself. Not convenient.
I put up with this for a while but an attempt to print some documents evening pushed me into investigating. The fix, as it turns out, is really simple!
The Canon MG5750 (and printers of its ilk) are designed to a price, and that is cheap. All components are nylon and plastic where possible, plastic is flimsy and important components like springs are small and presumably old stock - and this was ultimately the root cause of my problem.
- The symptom: the printer would be unable to take paper in, meaning it would sit and spin its internal rollers helplessly several times before complaining there was no paper loaded.
- The cause: a tiny spring, intended to load the paper intake rollers, is inadequately weak. The intake / feed-in rollers just slide around on top of the paper instead of gripping it and pulling it into the print mechanism.
- The solution: a bit of sponge (seriously).
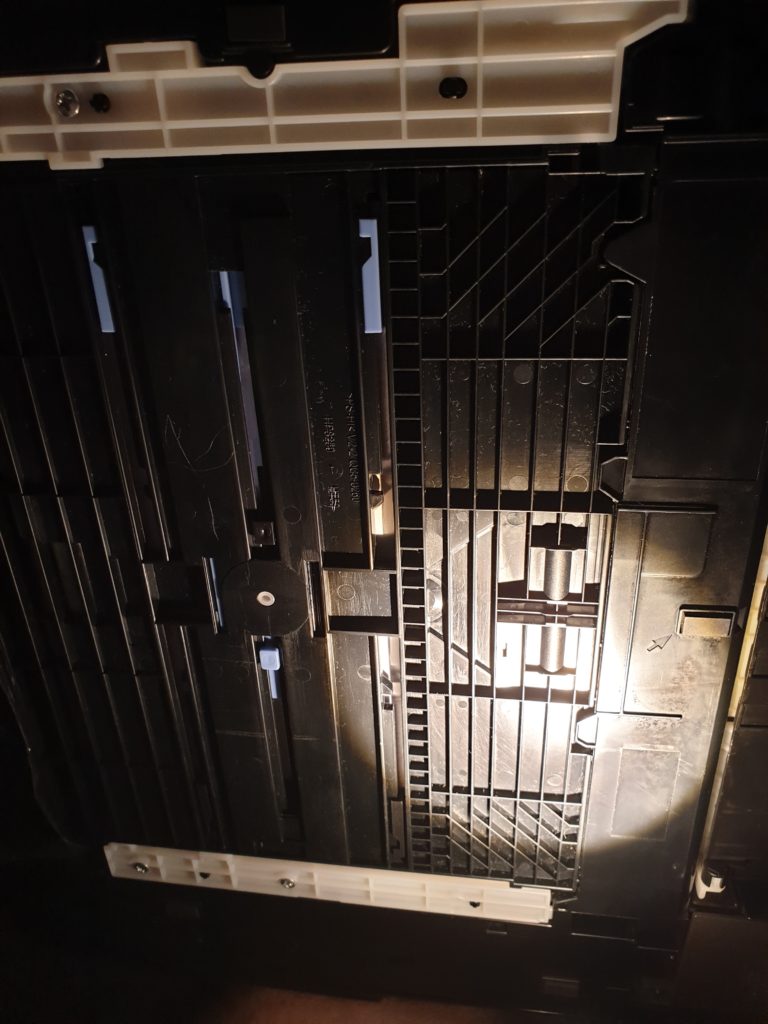
This is the underside of the printer. The paper tray forms the base of the printer when it's slid into place, the grey strips are its guide runners. (view larger)
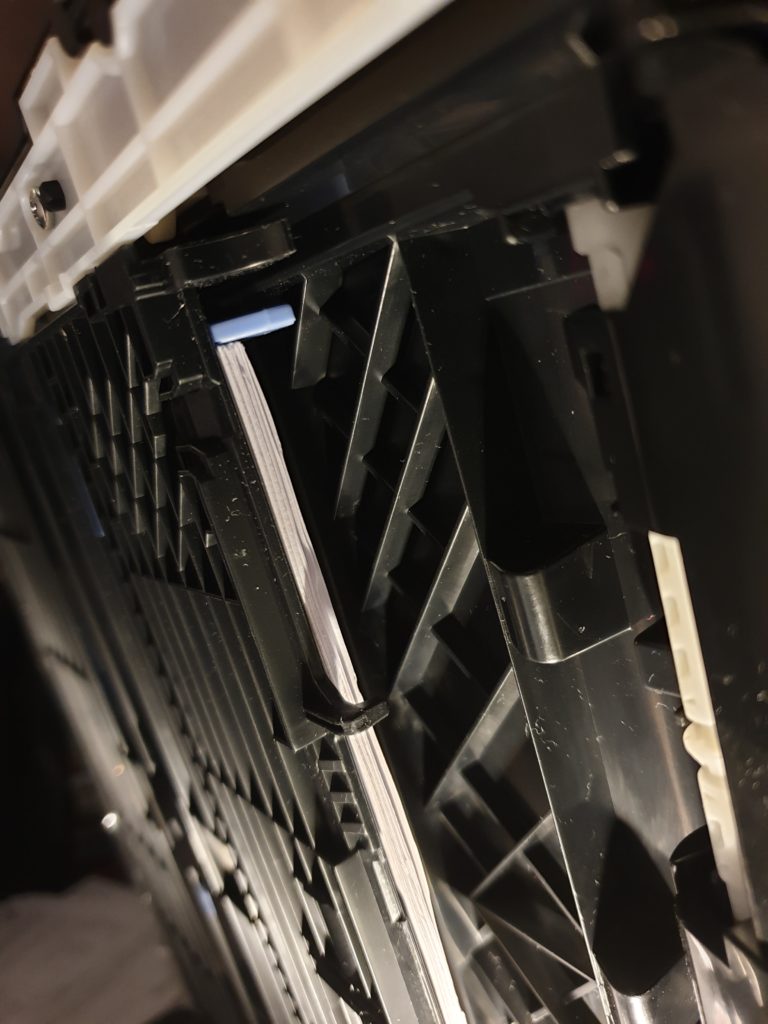
This is the underside of the printer with the paper tray semi-open.
What should happen: When you slide the paper tray closed, the black tab at the top of the image (just above the blue plastic you can see) contacts a protruding black plastic 'leg' which pushes the infeed roller arm up and over the paper as it's inserted. (view larger)
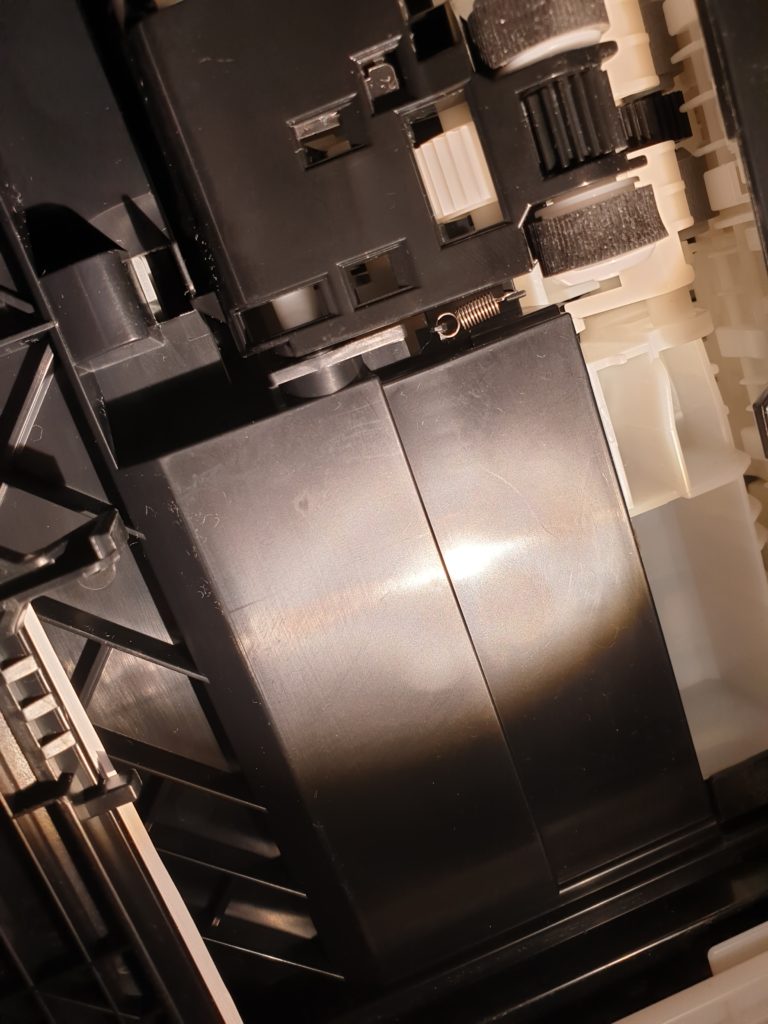
This would be fine, were the retaining spring applying opposing force be strong enough. It's a miserably tiny thing - see it near the middle of the photo, just next to one of the two black rubber paper intake rollers? (view larger)
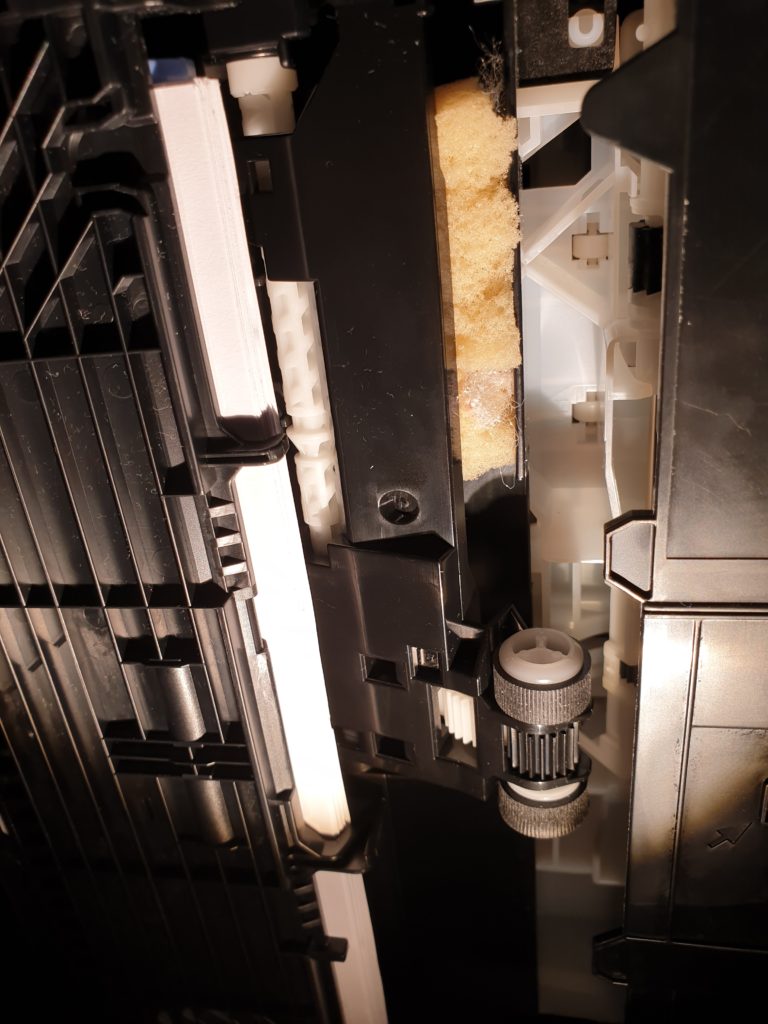
I tried all sorts - wrapping the rollers with small strips of tacky gaffertape to widen their diameter, pushing up on the underside of the paper tray to try and make them contact the rollers better, even moving the rubber tracks towards the edge of the wheels to make their edges 'ride up' and contact the paper better.
But in the end, some sponge (visible behind the bar supporting the feed rollers) solved the problem! (view larger)
Before I used the sponge method, moving the grippy rubber bands to the edge of the grooves on the rollers worked, proving it was a simple issue of roller clearance, but it's not ideal. You end up stretching the rubber tracks around the feed rollers, wearing them smooth prematurely and ending up with catastrophic loss of grip, just like excessive camber on F1 cars (ha).
There's nothing really you can adjust with these printers; the tension spring was just not good enough to adequately pull the rollers down into contact with the paper. So I went to the Internet for inspiration because I knew I wanted to somehow either add weight to the horizontal bar on which the rollers were mounted, or increase the spring tension.
I wanted to avoid removing the tiny tension spring, because they frequently fly off into another dimension, and fortunately I stumbled upon a post by David Camm on a TechAdvisor forum thread:
Hi Folks, this is an asy fix, get a sponge, I used the sponge off a dish scourer, you only need half of that, cut it off the scourer part.
Now find the paper feeder roller that takes the paper from the tray. (its under the printer behind a panel that has the paper in. You will notice the feeder roller attached to a plastic panel that moves up and down to grip the paper, this roller has a small spring on the side. I noticed there is hardly any force pressing the roller to the paper, hence the problem.
Put the sponge behind the piece of plastic away from the rollers taking care not to put it behind the actual rollers. This increases pressure on the roller so it takes the paper every time. just done 150 double sided sheets with no problems. Make sure the plastic holding the roller still moves up and down freely, the sponge should not be so tight as it prevents free movement.My MG550 had this issue from new as well but this spong has fixed it. Its very simple to do.
DavidCamm on TechAdvisor
I realised that, as long as you fitted correctly-sized pieces of sponge snugly, and underneath the part of the bar closest to the tray slide rail (and without it catching in the rotating arm which drives the rollers), this is a beautifully neat solution which solves the problem. An old Dishmatic head was just the right dimensions and with enough pushback thanks to the top layer to give the rollers adequate friction.
So thanks, David Camm, wherever you may be - you solved my frustrations and prevented me taking apart my printer in desperation to try and fix. Sometimes the stupidly simple solutions are the best!
This does make me wonder how many people have thrown away an otherwise functional printer, just because this roller and tension spring design isn't fit for purpose...
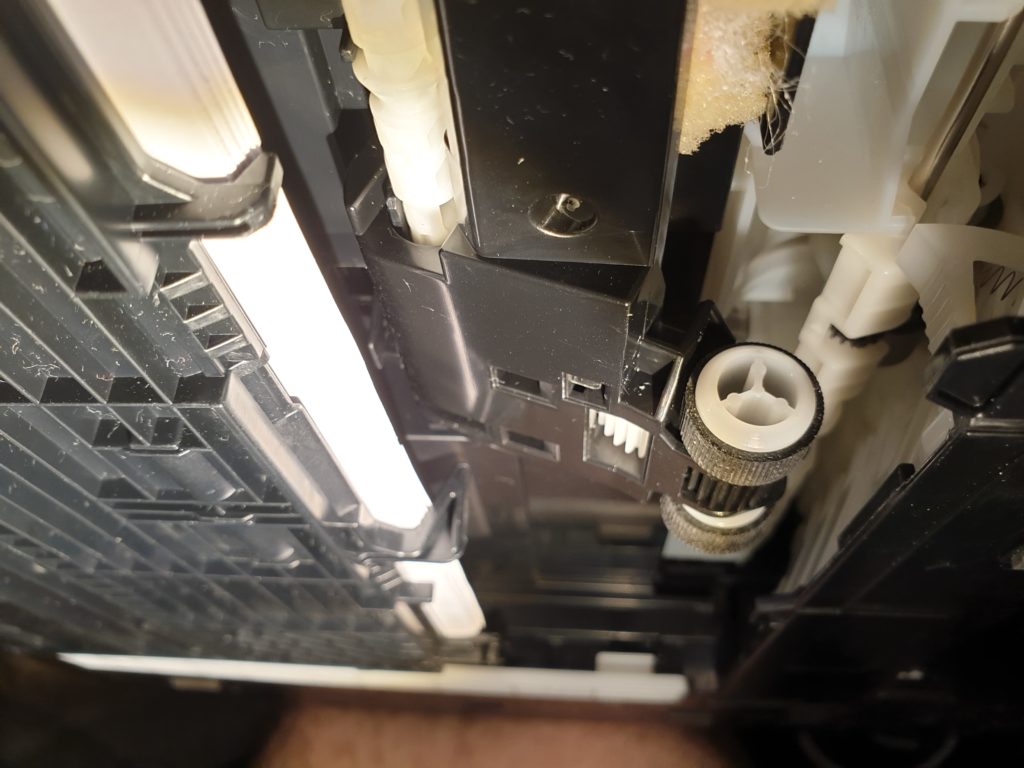
It's trivial to reach this area with the paper 'cassette' slid out, and is easily reversible should you decide you don't want sponge there any more. Prop the printer on your knee on its side and just add the sponge pieces as needed. I went for two rectangular pieces... Secure the sponge with gaffer tape if you're feeling nervous, but it should be fine there forever.
Happy printing!
Source: https://chriswoods.co.uk/2019/08/canon-pixma-paper-feed-roller-problems-diy-sponge-fix/
0 Response to "Canon Pixma Printer Feeds Paper Part of Way"
Post a Comment